
How to Charge a Scissor Lift Battery Charging, Storage, Inspection, and Safety
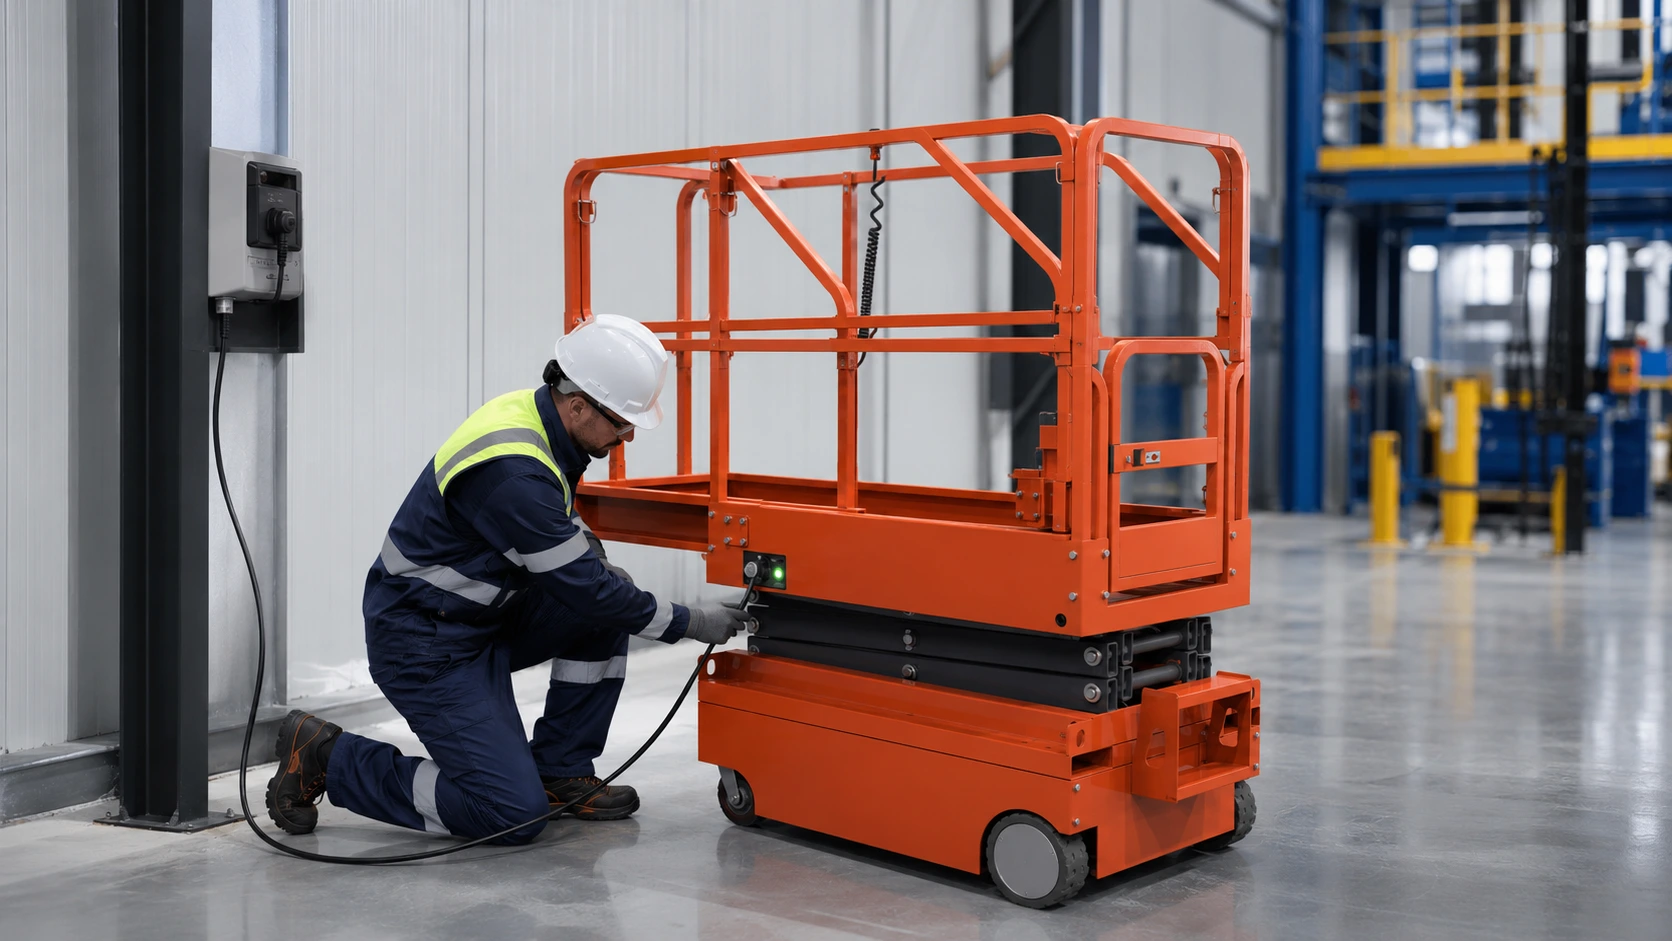
Knowing how to charge a scissor lift correctly is essential for reducing avoidable downtime, incomplete charging, and premature battery replacement. The correct procedure depends on the lift model, battery type, system voltage, charger configuration, and jobsite power supply. Before connecting any electric aerial lift to power, operators and maintenance teams should verify the specifications, inspect the charging system, and follow the instructions supplied with the equipment. These principles apply across many JQLIFT aerial work platforms, although the exact battery and charger configuration must be confirmed for each model.
What to Check Before Charging a Scissor Lift
A charging problem often begins before the charger is connected. An incompatible charger, damaged connector, unsuitable power source, or overlooked battery defect can interrupt charging and create additional service work.
Match the Battery System, Charger, and Power Supply
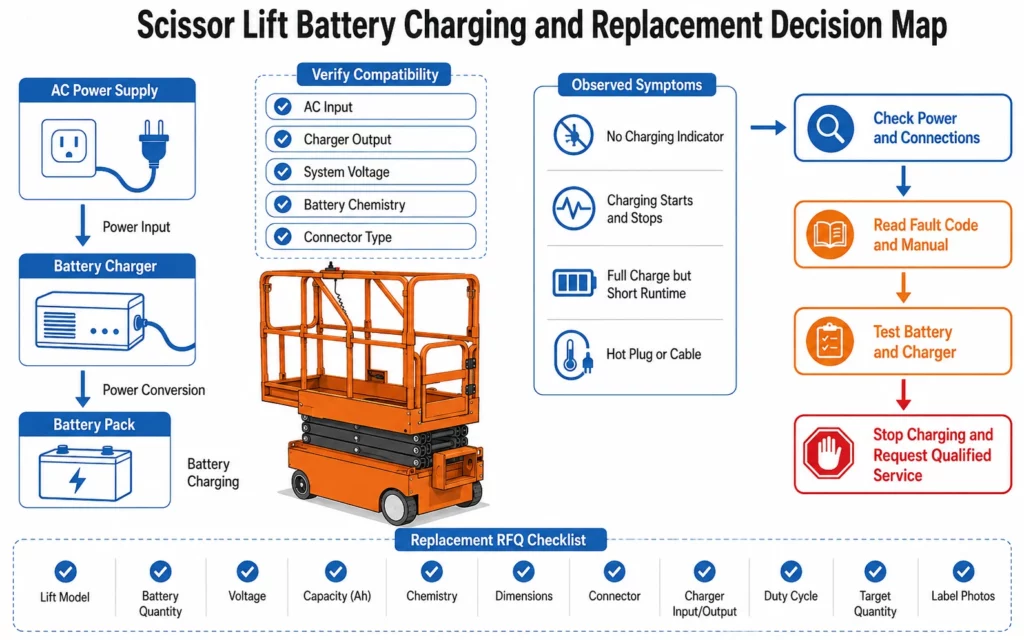
Start by checking the lift data plate, battery labels, charger label, and operator’s manual. Confirm the total battery-system voltage, battery quantity, rated capacity, battery chemistry, charger output, connector type, and required AC input.
A charger described only as a “24V scissor lift charger” is not automatically suitable for every 24V lift. Charger output, charging profile, connector arrangement, and supported battery chemistry should also match. A charger intended for one type of lead-acid battery may not be appropriate for another chemistry or for a lithium battery system.
This verification is particularly important when a lift has been moved between facilities, imported into a different power market, purchased used, or fitted with replacement batteries. If the battery or charger label is missing, damaged, or inconsistent with the product specification, the configuration should be confirmed with the equipment or charger supplier before charging.
Inspect the Battery, Cables, Connector, and Charging Area
A pre-charge inspection should cover the battery enclosure, terminals, cables, plugs, charging socket, charger housing, and visible wiring. Look for loose connections, corrosion, damaged insulation, cracked housings, heat discoloration, deformation, leakage, or an unusual odor.
The charging area should also be dry, adequately ventilated, and appropriate for the battery system. The power outlet and any permitted extension cable must be suitable for the charger’s input requirement. Long, undersized, damaged, or coiled extension cables may contribute to voltage drop or overheating.
Normal charging should not continue when there is visible battery damage, an overheated connector, fluid leakage, smoke, repeated circuit interruption, or evidence of burned wiring. In these situations, isolate the equipment according to site procedures and arrange an inspection by qualified service personnel.
How to Charge a Scissor Lift Battery Correctly
The following process provides a general framework for scissor lift battery charging. Model-specific instructions take priority because charging interfaces, indicator lights, and operating interlocks vary by equipment configuration.
Follow the Correct Charging Sequence
Park the lift on a stable surface in the designated charging area. Lower the platform, remove the machine from active service, and place the controls in the condition specified by the manufacturer. Check the battery and charging components before connecting the charger.
If the lift has a built-in charger, connect the charging lead to a compatible AC supply. For an approved external charger, verify the charger-to-battery connection before energizing the unit. Avoid forcing connectors or using adapters that have not been approved for the equipment.
Once charging begins, check that the charger or lift panel displays the expected charging status. Keep the equipment out of service unless the manufacturer specifically permits operation while connected to the charger. When charging is complete, disconnect power in the sequence stated in the manual, inspect the plug for unusual heat, and return the cable to its storage position.
Confirm That the Battery Is Charging and Reaches Full Charge
To determine whether a scissor lift is charging, check the charger indicator, charging panel, battery meter, or diagnostic display. A normal indication may involve a steady light, changing color, percentage display, or a sequence defined in the product manual.
No indicator, repeated flashing, an error code, or charging that stops shortly after connection may point to an input-power problem, poor connection, battery condition, temperature restriction, or charger fault. The meaning of each light or code should be verified against the correct charger documentation.
How long does a scissor lift take to charge? There is no universal figure. Charging time depends on battery capacity, remaining charge, charger output, battery condition, temperature, and whether the previous charging cycle was completed. A fixed number of hours should not replace the charger’s completion indicator or the manufacturer’s instructions.
Why Is the Scissor Lift Battery Not Charging?
When a scissor lift battery is not charging, replacing the battery immediately can waste time and purchasing budget. The cause may be outside the battery itself.
Diagnose the Problem Before Replacing Components
Begin with the external power source. Confirm that the outlet supplies the voltage required by the charger and that breakers, plugs, cables, and approved extension leads are functioning. Next, inspect the charging connector and verify that it is fully seated and undamaged.
Check the machine’s control condition, emergency stops, disconnect switches, and any charger interlock described in the manual. Then record the charger lights, error codes, sounds, and the point at which charging stops.
If the charger receives power but produces no expected charging indication, the fault may involve the charger, connector, wiring, control circuit, or battery condition. If the charger reports completion but the lift has very short runtime, the battery may be undercharged, imbalanced, deteriorated, or affected by another electrical problem. Battery and charger testing should precede replacement.
| Observed symptom | Possible cause | Appropriate next action |
|---|---|---|
| No charging indicator | No AC power or poor connection | Verify the outlet, plug, and connector |
| Charging starts and stops | Battery, temperature, or charger fault | Record the indication and check the manual |
| Full indication but short runtime | Battery condition or incomplete charging | Test the battery and review charging history |
| Plug or cable becomes hot | Connection or electrical fault | Stop charging and arrange an inspection |
Battery Maintenance and Storage Between Jobs
A battery can lose useful capacity even when the lift is rarely operated. Repeated partial charging, extended discharged storage, dirty connections, unsuitable temperatures, and neglected inspections can all contribute to poor performance.
Build a Maintenance Routine Around the Battery Type
Routine scissor lift battery maintenance should include visual inspection, terminal and cable checks, cleaning methods approved for the equipment, review of charging records, and comparison of expected and actual runtime.
Maintenance requirements depend on battery chemistry. Flooded lead-acid, AGM, gel, and lithium systems should not be treated as interchangeable. Watering or equalization may apply to certain battery designs but may be inappropriate for sealed or lithium systems. The battery documentation should determine whether these procedures are required and how they are performed.
Recording charging time, operating hours, error codes, service events, and abnormal heat makes gradual deterioration easier to identify. It also gives service teams better evidence when deciding whether the battery, charger, or another electrical component requires attention.
Store the Lift Without Damaging the Battery
Before storage, clean and inspect the machine, review the battery state, and follow the shutdown procedure for that model. The storage location should meet the temperature, moisture, ventilation, and security conditions specified for the equipment and battery.
How often scissor lift batteries should be charged during storage depends on battery chemistry, self-discharge rate, storage duration, temperature, and the manufacturer’s recommendations. A universal recharge interval or storage state of charge should not be applied across different battery systems.
For long-term storage, create a documented inspection schedule covering battery condition, charger condition, connection security, and periodic charging where required. Before returning the lift to work, inspect it again, complete the specified charging cycle, and perform the required pre-use checks before applying a normal operating load.
When to Replace the Battery or Charger
Replacement decisions should be based on symptoms, tests, specifications, and service history. Short runtime alone does not prove that a battery has reached the end of its useful service life.
Separate Battery Failure From Charger or Wiring Problems
A deteriorating battery may show reduced runtime, difficulty reaching full charge, inconsistent performance between cycles, or rapid voltage decline under load. Similar symptoms can also result from an unsuitable charger, incomplete charging, loose connections, damaged cables, or a control-system problem.
Compare battery performance after a verified full charging cycle. Review fault codes and charging history, inspect individual connections, and arrange appropriate battery and charger tests. A battery that repeatedly fails testing after correct charging may require replacement. A charger that has incorrect output, persistent fault indications, or visible damage should be evaluated separately.
Continuing to replace batteries without checking the charger can allow the original fault to damage or undercharge the new battery set.
Prepare the Correct Specifications for a Replacement RFQ
A replacement battery or charger RFQ should include the lift manufacturer and model, battery quantity, total system voltage, individual battery voltage, rated capacity, chemistry, dimensions, terminal arrangement, connector, and available label photographs.
For a charger, include the AC input requirement, DC output voltage and current, supported battery type, charging connector, mounting arrangement, and indicator or fault-code information. Also state the target quantity, operating environment, daily duty cycle, and observed problem.
Do not select a replacement solely from equipment appearance or nominal voltage. Dimensional fit, electrical compatibility, charging profile, cable arrangement, and service documentation all affect whether the component is suitable.
How to Evaluate an Electric Lift Supplier’s Charging Support
B2B buyers should review the charging system while selecting the lift, not after the equipment arrives. Useful product documentation should identify the battery configuration, charger rating, charging interface, battery-level indication, power requirement, and maintenance access. Buyers should also confirm whether manuals and replacement-component information are available for the exact model.
A supplier offering multiple electric scissor lifts should distinguish the battery and charger configuration of each model instead of presenting one specification for the entire range.
For example, JQLIFT publishes two 12V/80Ah batteries, a 24V/15A charger, and a battery-level display for the ASF small electric scissor lift. Its electrical section uses a drawer-style arrangement intended to simplify maintenance and battery replacement. These details help buyers evaluate charging compatibility and service access, but charging time, battery chemistry, and site suitability still need to be checked against the final product specification.
Purchasers should also ask about local input power, operating frequency, shift length, indoor or outdoor conditions, battery access, charger placement, documentation, and replacement-part identification. A supplier assessment based on these points is more useful than comparing battery capacity alone.
Conclusion
Correct scissor lift battery charging starts with specification matching, inspection, and attention to the charger’s actual status indicators. When charging fails, check the external power supply and connections before assuming that the battery needs replacement. Maintenance records and a model-specific storage plan can further reduce avoidable downtime.
For equipment selection, replacement planning, or charging-system questions, buyers can contact JQLIFT with the lift model, battery and charger labels, site power, application, duty cycle, target quantity, and photographs of the connector or observed fault.
FAQs
How long does it take to charge a scissor lift?
Charging time varies with battery capacity, remaining charge, charger output, temperature, and battery condition. Use the completion indication and charging instructions for the specific lift and charger rather than relying on a universal time estimate.
How do I know if my scissor lift is charging?
Check the charger light, charging panel, battery meter, or diagnostic display. Compare the indication with the model manual. No light, repeated flashing, an error code, or an unexpectedly short cycle may require further inspection.
Can a scissor lift be used while charging?
This depends on the machine design and manufacturer’s instructions. The equipment should remain out of service while charging unless the documentation specifically permits operation in that condition.
How should a scissor lift battery be stored?
Follow the battery and lift manufacturer’s requirements for temperature, ventilation, charge condition, shutdown, inspection, and periodic recharging. Storage requirements vary by battery chemistry and duration.
What information is needed to order a replacement battery or charger?
Provide the lift model, battery quantity, voltage, capacity, chemistry, dimensions, terminal arrangement, connector type, charger input and output, target quantity, and clear photographs of the component labels.


